
Your Ultimate 10-Step Onboarding Client Checklist for Vacation Rentals
Streamline your new property workflow with our actionable onboarding client checklist. Get templates, tips, and steps for a seamless client handoff.

Disclosure: Some links in this article are affiliate links. If you make a purchase, we may earn a commission at no extra cost to you. This helps support our content.
Bringing a new property into your portfolio can feel like a whirlwind of spreadsheets, frantic texts, and forgotten details. We've been there. After managing our own properties for over a decade—from our home in Washington, DC to beach houses in the Riviera Maya—we learned that a great guest experience starts long before check-in. It begins with a flawless client onboarding process. A structured system doesn't just save you headaches; it sets the foundation for professionalism, reduces errors, and ensures every new property is guest-ready from day one.
A well-defined onboarding client checklist is your single source of truth. It transforms a potentially chaotic transition into a predictable, scalable system that impresses property owners and prevents last-minute scrambles. This systematic approach is crucial for building trust and setting clear expectations from the outset. Strong client relationships start with great communication, and following proven client communication best practices can provide valuable guidance for your onboarding process.
In this guide, we're sharing the exact checklist we've refined over the years. This is what has worked for us. It’s not about rigid rules, but about creating a reliable framework that works for you, ensuring nothing slips through the cracks. We'll cover everything from initial account setup and brand customization to generating QR codes, configuring an AI chatbot, and setting up analytics. This is the blueprint that has helped us scale our operations while keeping both clients and guests happy. Let's dive in.
1. Account Setup and Profile Configuration
The very first step in any successful client onboarding checklist is creating a solid foundation. For hosts using a platform like SmoothStay, this means getting the initial account setup and profile configuration done right. This isn't just a formality; it establishes your professional identity, determines which features you can access, and sets the stage for a smooth management experience.
This initial setup involves creating your login, verifying your email, and inputting your essential business details. Think of it as laying the digital groundwork for your entire guest management system. A complete and accurate profile ensures that all subsequent steps, from creating guidebooks to setting up automated messages, pull the correct information, saving you from future headaches.
How to Get Started
Setting up your account is straightforward, but a few thoughtful choices here can make a big difference.
Choose the Right Plan: Before signing up, review the available subscription tiers. A solo host with one property has different needs than a manager with a growing portfolio. For instance, SmoothStay's Starter plan is great for getting one property online, while the Host Plan offers features better suited for multiple listings. The 14-day trial is a great way to test-drive all the features and confirm you've selected the right fit.
Use Professional Credentials: We've found it's best to use a professional, business-specific email address for your account. This not only looks more credible but also helps keep your business communications separate from personal ones.
Secure Your Access: Once you create your login credentials, store them immediately in a secure password manager like 1Password or LastPass. This is a simple but critical security measure to protect your account and your clients' information.
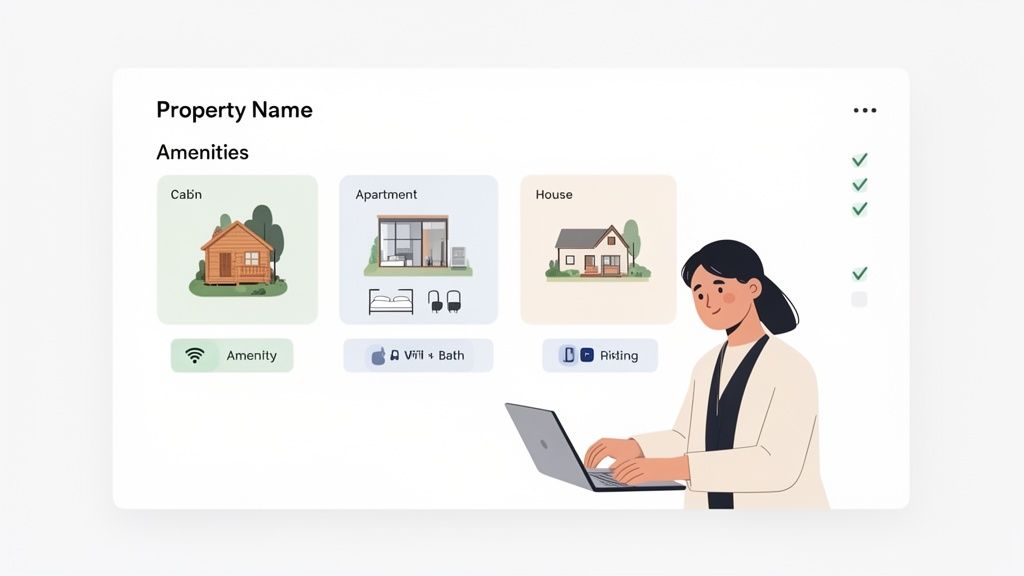
2. Property Information and Listing Details Entry
After setting up your account, the next critical step in your onboarding client checklist is to input comprehensive details about each rental property. This stage involves populating your SmoothStay dashboard with everything from the property's name and address to its unique amenities and house rules. This information forms the digital backbone of your guest management system, directly feeding into your personalized guidebooks and enabling the AI to provide smart, context-specific answers to guest inquiries.
Think of this as creating a detailed blueprint of each property. The more specific and accurate the information, the more helpful your guest communication becomes. For a detailed walkthrough on entering property information and listing details, you might find this helpful guide on how to list your property on Airbnb for rent.
How to Get Started
Gathering and entering property data methodically will save you significant time and ensure a higher-quality output for your guests.
Compile All Information First: Before you begin data entry, gather all necessary documents and details. This includes the full address, emergency contact numbers, WiFi passwords, and a complete list of amenities. Having this ready prevents stopping and starting.
Use Consistent Naming Conventions: If you manage multiple properties, establish a clear and consistent naming convention from the start (e.g., "Seaside Cottage - Unit A," "Downtown Loft - Unit B"). This organizational habit makes things much easier as your portfolio grows.
Highlight Unique Features: Don't just list standard amenities; be specific about what makes the property special. Mention the brand of the coffee maker, the specific temperature controls for the hot tub, or the location of the best beach access point. These small details add real value to the guest experience.
Keep Information Current: Property details can change. Remember to update your SmoothStay profile seasonally or whenever you make an upgrade. Adding a new smart lock or changing the WiFi network? Update it immediately to prevent guest confusion and negative reviews.
3. Brand Customization and Visual Identity Setup
Once the foundational account and property details are in place, the next step is to establish your brand's visual identity. This involves customizing the look and feel of your guest communications, particularly your digital guidebook. This isn't just about aesthetics; it's about creating a cohesive, professional, and memorable brand experience that distinguishes your property from the competition.
With a platform like SmoothStay, this means uploading your logo, selecting brand colors, and choosing fonts that align with your property’s unique character. Because it’s a fully white-label solution, your brand takes center stage, creating a seamless experience for guests without ever asking them to download an app. A strong visual identity reinforces your professionalism and helps build guest trust from the first interaction.
How to Get Started
Setting up your brand identity is an opportunity to let your property's personality shine. A few thoughtful choices here can elevate the entire guest experience.
Define Your Visual Style: Before you start uploading assets, consider the property’s identity. A luxury mountain cabin might use earthy tones and elegant fonts, while a vibrant beachside condo could use ocean blues and a more casual style. The goal is to create a visual language that feels authentic to the guest experience you offer.
Upload High-Quality Assets: Use a high-resolution version of your logo to ensure it looks crisp on all devices. A transparent PNG file is often best as it will sit cleanly on any background color you choose. This small detail makes a big difference in how professional your guidebook looks.
Create a Cohesive Color Palette: Stick to two or three primary brand colors for a clean, uncluttered look. You can use a color-picker tool to pull hex codes directly from your logo or website for perfect consistency.
Test on Mobile: The vast majority of guests will access your guidebook on their smartphones. Before you finalize your design, always preview it on a mobile device to ensure your logo is legible, your colors have good contrast, and your font choices are clear and easy to read on a smaller screen.
4. Check-in Instructions and Access Information Setup
A seamless guest arrival is non-negotiable for securing five-star reviews, and it all starts with crystal-clear check-in instructions. This part of your onboarding client checklist is where you build the digital equivalent of a friendly welcome at the door. It involves documenting every step of the arrival process, from finding the property to unlocking the front door, ensuring guests feel confident from the moment they arrive.
This step directly addresses one of the most common sources of guest anxiety and late-night calls. By creating a detailed, easy-to-follow guide, you answer questions about parking, key locations, and entry codes before they're even asked. With a tool like SmoothStay, you can organize this information beautifully and even control when guests receive it, which helps prevent early arrivals and maintains security.
How to Get Started
Building a bulletproof check-in guide involves thinking like a first-time visitor who is arriving late at night in bad weather. What would they need to know?
Visualize the Journey: Use photos and short videos for critical steps. For our properties, we include pictures showing the driveway entrance, the designated parking spot, and a close-up of the smart lock. For an urban apartment, this might be a video of how to use the lobby buzzer system. Visuals remove ambiguity.
Structure with Clarity: Use a numbered, step-by-step format. Start with the property address and a link to Google Maps, then detail parking, finding the entrance, and finally, accessing the unit. Simplicity is key.
Provide Failsafes: Always include a backup plan. What if the smart lock battery dies? Provide the location of a hidden lockbox with a physical key. What if they can't find the entrance? List a primary and secondary contact number. This foresight builds trust.
Leverage Technology: With SmoothStay, we use QR codes on a small welcome card inside the property that links directly to the WiFi password and other essentials in the digital guidebook. This saves guests from having to scroll through old messages to find what they need.
5. Local Recommendations and Area Guide Content Creation
Once a guest books, their experience begins long before they arrive. A key part of your client onboarding checklist is creating a rich, personalized area guide. This isn't just about listing a few popular spots; it's about curating a local experience that sets your property apart and makes guests feel like they have an inside connection. This thoughtful touch demonstrates your expertise as a host and significantly boosts guest satisfaction.
Creating a guide filled with local recommendations elevates your service from simply providing a place to stay to offering a memorable trip. Whether it’s a list of family-friendly activities, the best coffee shops within walking distance, or hidden gems only locals know about, this content adds immense value. It answers guest questions proactively and shows you genuinely care about their trip.
How to Get Started
Building an exceptional area guide is simpler than it sounds, especially with the right tools and a clear strategy. This is what has worked for us.
Curate with a Personal Touch: Don't just list tourist traps. Think about what makes your location special. For a mountain cabin, detail your favorite hiking trails with difficulty ratings and seasonal tips. For a city apartment, recommend the neighborhood bakery with the best croissants. The most valuable recommendations come from your own experience.
Leverage AI for Efficiency: Writing descriptions for dozens of recommendations can be time-consuming. Use a tool like SmoothStay’s AI assistant to generate initial drafts for restaurants and attractions. You can then personalize these with your unique insights, such as mentioning a specific dish to try or the best time to visit to avoid crowds.
Organize for Guest Convenience: Structure your recommendations logically. Create categories like "For Foodies," "Family Adventures," or "Rainy Day Activities." For each entry, include the address, opening hours, contact info, and its distance from your property. This thoughtful organization is a crucial step in building a great electronic guidebook that guests will actually use.
6. Appliance and Property Feature Tutorial Documentation
A key part of any effective onboarding client checklist involves helping guests use your property confidently and safely. This means creating clear, accessible instructions for appliances, smart home systems, and unique property features. From the smart TV and coffee maker to the hot tub jets and HVAC system, detailed tutorials prevent guest frustration, reduce late-night support calls, and minimize the risk of damage from misuse.
Think of this as proactive problem-solving. Instead of waiting for a guest to ask how the complex remote works, you provide a simple video or photo guide right in their digital guidebook. This elevates the guest experience by making them feel capable and self-sufficient, turning potential pain points into moments of seamless enjoyment. It’s a small investment of time that pays dividends in guest satisfaction.
How to Get Started
Creating this documentation is easier than it sounds, and a little effort goes a long way in making guests feel at home.
Leverage Multiple Formats: Cater to different learning styles. A quick smartphone video is perfect for demonstrating the smart lock, while a laminated card with photos works well for operating the hot tub controls. Written instructions are essential for safety information, like how to properly use a wood-burning stove.
Generate Content with AI: For standard appliances, you don't have to start from scratch. Tools like SmoothStay's AI can automatically generate clear, concise operating instructions. Simply input the appliance model, and the system can draft a step-by-step guide, which you can then customize with property-specific details.
Focus on High-Risk and High-Confusion Items: Prioritize creating tutorials for items that are most likely to cause issues or pose a safety risk. This includes smart home tech, pool and hot tub equipment, and any unique or older appliances. Include common troubleshooting steps, like how to reset the Wi-Fi.
Centralize Everything in Your Guidebook: The best instructions are useless if guests can't find them. Consolidate all your tutorials within your digital guidebook. This creates a single source of truth that guests can access on their phones anytime, anywhere.
7. QR Code Generation and Access Link Configuration
The next critical step in a modern onboarding client checklist is to bridge the gap between the physical property and the digital resources your guests need. Configuring QR codes and custom access links for your digital guidebook allows you to deliver specific, context-aware information exactly when and where guests need it.
This process involves generating unique QR codes that, when scanned, direct guests to precise sections of your SmoothStay guidebook. Think of it as creating smart shortcuts to essential information. Instead of a guest scrolling through a long PDF, a quick scan can take them directly to the Wi-Fi password, check-in instructions, or a video tutorial for the smart TV. This proactive approach significantly reduces guest friction.
How to Get Started
Implementing QR codes is simple with the right tools, and the impact on the guest experience is immediate.
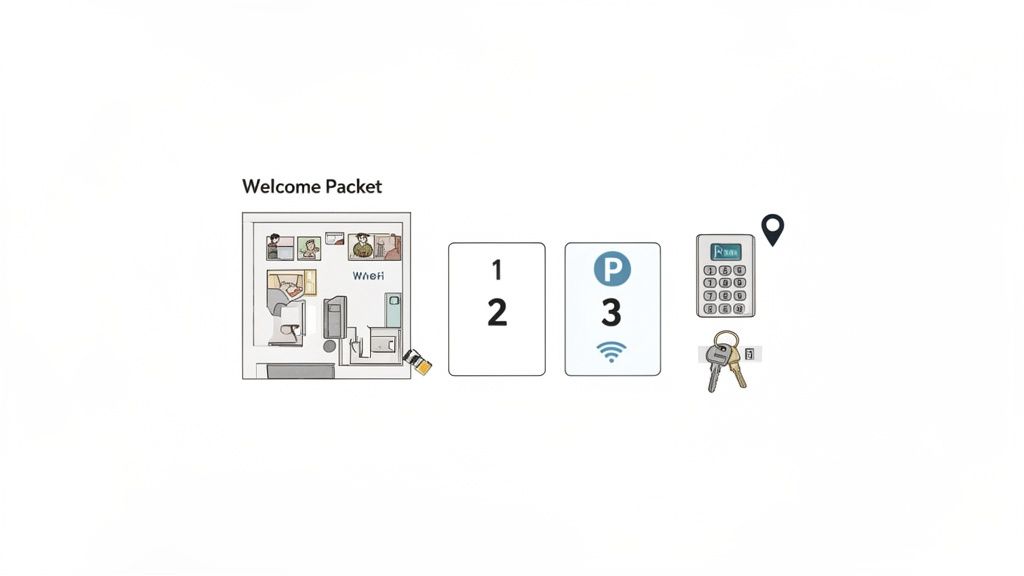
Create Your Primary Access Point: Your first step is to generate a primary QR code that links to the main landing page of your guidebook. Place this code prominently in your welcome email and on any printed materials like a welcome card near the entryway. This ensures every guest knows how to access all your property information from the moment they arrive.
Generate Section-Specific Codes: Go a step further by creating QR codes for specific high-traffic sections. For example, place a small QR code sticker on the coffee machine that links directly to brewing instructions, or one on the thermostat that opens a guide to the climate controls. This provides instant, targeted help.
Test and Monitor: Before printing and distributing, rigorously test every QR code using different devices (both Android and iOS) to ensure they work perfectly. Once live, check your SmoothStay analytics to see which QR codes are being scanned most frequently. This data provides valuable insight into what information your guests seek most often.
8. Guest Communication and AI Chatbot Configuration
A crucial part of any modern onboarding client checklist is establishing a scalable guest communication system. For property managers handling multiple listings, answering the same questions about Wi-Fi or parking becomes a major time drain. This is where configuring an AI chatbot becomes a game-changer, automating responses to common inquiries and ensuring guests receive instant support 24/7.
This setup involves training a smart assistant, like the one integrated into SmoothStay, using your property-specific information from the digital guidebook. The chatbot learns from this content to handle frequently asked questions, freeing you to focus on more complex guest needs and high-level management tasks. For hosts we work with, this is often the key to scaling their business without scaling their support staff.
How to Get Started
Setting up your AI chatbot is less about technical skill and more about providing high-quality information. The smarter your guidebook, the smarter your chatbot.
Build a Comprehensive Guidebook: The chatbot’s effectiveness is directly tied to the quality of your digital guidebook. Ensure every section is detailed and clear, covering house rules, check-in/out procedures, appliance instructions, and local recommendations. A well-organized FAQ section in your guidebook is the perfect training ground for the AI.
Review and Refine Conversations: Once live, regularly check the chatbot’s conversation logs. This is your best source of feedback to identify what guests are asking, where the chatbot excels, and where it struggles. Use these insights to update your guidebook and improve the AI’s accuracy over time.
Set Clear Escalation Paths: The goal isn't to replace human interaction entirely but to enhance it. Clearly define which queries the chatbot should handle and provide a simple way for guests to contact you or your team for complex issues. This ensures the chatbot manages the routine while you handle the exceptions. To dive deeper into this topic, you can learn more about how a vacation rental chatbot can transform your operations.
9. Analytics Setup and Engagement Tracking
Once your guidebooks are live, the next step in a thorough onboarding client checklist is to unlock the power of data. Setting up analytics and engagement tracking is your window into guest behavior. This process allows you to see exactly how guests interact with your content, revealing what's helpful, what's ignored, and where you can make improvements.
Think of analytics as a direct feedback loop. Instead of guessing what information your guests need most, you can see it in real-time. For example, SmoothStay's built-in analytics dashboard shows which sections of your guidebook are viewed most, how long guests spend on each page, and what questions they ask the AI chatbot. This data is invaluable for optimizing your content and reducing repetitive questions.
How to Get Started
Leveraging data helps you move from reactive to proactive guest management. Here are a few ways to begin using analytics.
Activate and Familiarize Yourself: The first step is to ensure tracking is enabled in your SmoothStay dashboard. Take a few minutes to explore the analytics section and understand the key metrics available, such as page views, unique visitors, and engagement time.
Establish a Baseline: During your first few bookings, let the data accumulate to establish a baseline for "normal" engagement. For example, you might find that 45% of guests access the Wi-Fi instructions within 30 minutes of check-in. This benchmark helps you spot trends later on.
Focus on Actionable Insights: Focus on data that drives decisions. If analytics show that your restaurant recommendations have a 60% engagement rate, it validates the time spent curating that list. Conversely, if a section on using the coffee maker gets zero views but you receive questions about it, you know the information needs to be more prominent or clearer.
Review and Iterate Weekly: Make it a habit to check your analytics weekly. This regular review allows you to identify trends early and make small, continuous improvements. Cross-referencing these insights with guest reviews will give you a complete picture of the guest experience.
10. Multi-Language Support Configuration and International Guest Preparation
In today's global travel market, language shouldn't be a barrier to a five-star experience. This is where configuring multi-language support becomes a critical part of your onboarding client checklist. For hosts using a platform like SmoothStay, which supports over 100 languages, this step involves making your guidebooks accessible to guests in their native tongue. It's about showing international visitors that you’ve anticipated their needs.
Setting up multi-language support is a strategic move to enhance guest comfort, reduce misunderstandings, and broaden your property's appeal. When a guest from Germany can read your check-in instructions in German, it instantly builds trust and makes their stay smoother. This preparation is a powerful way to stand out in a competitive market.
How to Get Started
Configuring your guidebook for multiple languages is a straightforward process that delivers an outsized impact on the international guest experience.
Analyze Your Guest Demographics: Before you start translating, dive into your booking history. Identify the top countries your guests are coming from. If you notice a significant number of visitors from France, Germany, and Spain, those are the first three languages to prioritize. This data-driven approach ensures your efforts have the most impact.
Leverage Auto-Translation and Review: SmoothStay's platform can automatically generate translated versions of your guidebook. Start there to do the heavy lifting. However, for key sections like check-in instructions or house rules, it’s a good idea to have a native speaker review the content for cultural accuracy. This blend of automation and human touch ensures clarity.
Customize Content for Each Language: Consider adapting your recommendations for different cultures. For example, in the Spanish version of your guide, you might highlight different restaurants or local activities. Also, remember to include metric conversions (e.g., kilometers instead of miles, Celsius instead of Fahrenheit) in the relevant language versions to make the information truly useful for your guests.
10-Item Client Onboarding Checklist Comparison
Feature | Implementation Complexity (🔄) | Resource Requirements (⚡) | Expected Outcomes (⭐ 📊) | Ideal Use Cases (💡) |
|---|---|---|---|---|
Account Setup and Profile Configuration | 🔄 Low — guided onboarding, email verification | ⚡ Minimal — basic info, plan selection, ~10–20 min | ⭐ Establishes identity & access; 📊 Enables analytics and trial evaluation | 💡 New hosts; solo hosts testing platform |
Property Information and Listing Details Entry | 🔄 Medium — detailed data entry for AI accuracy | ⚡ Medium — property docs, photos; time scales with portfolio size | ⭐ Property-specific AI content; 📊 Significant manual time savings | 💡 Multi-property managers; hosts wanting automated guidebooks |
Brand Customization and Visual Identity Setup | 🔄 Low–Medium — design choices and testing | ⚡ Medium — logos, color palette, font selection, mobile checks | ⭐ Professional branded experience; 📊 Higher perceived value/credibility | 💡 Luxury rentals, boutique hotels, hosts prioritizing branding |
Check-in Instructions and Access Information Setup | 🔄 Medium — security & time-based delivery considerations | ⚡ Medium — photos, maps, code verification, testing | ⭐ Fewer arrival support requests; 📊 Up to ~80% reduction in check-in inquiries | 💡 Self-check-in properties; complex access procedures |
Local Recommendations and Area Guide Content Creation | 🔄 Medium–High — curation and regular updates needed | ⚡ Medium — research, seasonal updates; AI-assisted copy speeds work | ⭐ Better reviews & guest satisfaction; 📊 Increased repeat bookings/referrals | 💡 Hosts differentiating stays via local expertise |
Appliance and Property Feature Tutorial Documentation | 🔄 Medium — multimedia creation and safety guidance | ⚡ High — videos/photos, manuals, periodic updates | ⭐ Fewer operation-related support requests; 📊 Reduced misuse/liability | 💡 Properties with complex systems or high-value equipment |
QR Code Generation and Access Link Configuration | 🔄 Low — automated generation, placement planning required | ⚡ Low — generate codes, optional printing, test on devices | ⭐ Instant, app-free access; 📊 Track scans and section engagement | 💡 Welcome packets, pre-arrival emails, on-site signage |
Guest Communication and AI Chatbot Configuration | 🔄 High — training, monitoring, escalation flows | ⚡ Medium–High — well-structured guidebook content, ongoing tuning | ⭐ 24/7 instant support; 📊 Automates large portion (~80%) of routine inquiries | 💡 High-volume hosts; property managers scaling support |
Analytics Setup and Engagement Tracking | 🔄 Medium — configure metrics and dashboards | ⚡ Low–Medium — enable tracking, dedicate review time weekly | ⭐ Data-driven content optimization; 📊 Visibility into engagement & ROI | 💡 Hosts optimizing guidebook effectiveness and support reduction |
Multi-Language Support Configuration and International Guest Preparation | 🔄 Medium — translation & cultural adaptation work | ⚡ Medium–High — AI translation plus native review for accuracy | ⭐ Improved international guest experience; 📊 Expanded booking market and ratings | 💡 Properties with international bookings or diverse guest origins |
Your Blueprint for Effortless Growth
Moving from one or two properties to a growing portfolio is an exciting leap, but it’s also where many hosts hit a wall. Without a system, every new client becomes a frantic scramble of forgotten passwords, missed details, and inconsistent guest experiences. This detailed onboarding client checklist is your blueprint to break through that barrier. It transforms the chaotic process of bringing on a new property into a smooth, repeatable, and professional workflow.
The power of this checklist lies in its structure. By breaking down the task into distinct phases, from pre-onboarding paperwork to post-launch optimization, you create a predictable and scalable engine for growth. You’re no longer just adding another property; you're integrating a new asset into a well-oiled machine. This systemization is what separates amateur hosts from professional property managers.
Key Takeaways for Sustainable Success
Reflecting on the entire process, a few core principles stand out for anyone serious about scaling their vacation rental business:
Front-Loading is Your Superpower: The detailed work you do in the beginning—from gathering every appliance manual to crafting check-in instructions—pays massive dividends later. Every hour spent during onboarding saves you ten hours of frantic guest communication down the line.
Consistency Breeds Trust: When a guest stays at one of your properties, they should feel a consistent standard of quality, regardless of the owner. A standardized onboarding process ensures every listing has the same high-quality digital guidebook, the same clear access instructions, and the same helpful local tips. This builds your brand reputation.
Documentation is Liberation: A well-documented property is a self-sufficient one. By creating a comprehensive knowledge base for each client's rental, complete with QR codes for appliances and detailed tutorials, you empower guests to solve their own minor issues. This frees you up to focus on growth.
Technology as Your Partner: Tools like digital guidebooks and AI chatbots are essential for creating professional, 24/7 guest service that you can't provide alone. Leveraging automation for repetitive tasks is the key to managing more doors without burning out.
Your Actionable Next Steps
Feeling motivated? Here's how to turn this checklist into action:
Customize Your Master Checklist: Take the framework in this article and adapt it to your specific business needs. Add items unique to your market, like hurricane preparedness guides or ski-in/ski-out instructions.
Build Your Template Library: Create a central folder (we recommend a cloud service like Google Drive or Dropbox) to house your template welcome emails, document request lists, and standardized forms.
Onboard a "Test" Property: If possible, run through your new checklist with a friendly existing client or even one of your own properties. This trial run will help you identify gaps and refine your process before using it with a new client.
Ultimately, this onboarding client checklist is more than a to-do list; it’s a commitment to excellence and a strategic asset for your business. It’s the foundation that allows you to confidently say "yes" to new clients, knowing you have a proven system to deliver five-star results every single time. By mastering this process, you’re not just getting organized; you're building a resilient, scalable, and highly profitable hospitality brand.
Ready to put this checklist into hyperdrive? The principles of systemization and guest empowerment are built directly into SmoothStay. Our platform helps you execute key parts of your onboarding, from building a beautiful, professional guidebook with guest-first features to deploying an AI-powered chatbot that handles guest questions instantly, all from a single, easy-to-use dashboard. See how SmoothStay can streamline your client onboarding today.

